import os, time, shutil
from datetime import date
sourceDirHome = "F:\DCIM"
TargetDirHome = 'E:\Personnel\Photos'

for dirName, subdirList, fileList in os.walk(sourceDirHome):
    print("Found Directory",dirName)
    #break
    for f in fileList:
        print("File name is:",f)
        fName = os.path.join(dirName,f)
        print(fName)
        ctime = (os.path.getctime(fName))
        print("Created On", ctime)
        fmtTimeYM = time.strftime('%Y-%m',time.localtime(ctime))
        fmtTimeY = time.strftime('%Y', time.localtime(ctime))
        fmtTimeM = time.strftime('%m', time.localtime(ctime))
        print('formatted time: ',fmtTimeYM)
        tgtpthstrY = os.path.join(TargetDirHome,fmtTimeY)
        tgtpthstrYM = os.path.join(tgtpthstrY,fmtTimeYM)
        if os.path.exists(tgtpthstrYM):
            print(tgtpthstrYM, 'Exists.. copying... 1')
            shutil.copy(fName,tgtpthstrYM)
        else:
            if os.path.exists(tgtpthstrY):
                print(tgtpthstrYM, 'Does Not Exists.. creating... 2')
                os.mkdir(fmtTimeYM)
                shutil.copy(fName, tgtpthstrYM)
            else:
                print(tgtpthstrY, 'Does NOt Exists.. creating... 3')
                os.mkdir(tgtpthstrY)
                os.mkdir(tgtpthstrYM)
                shutil.copy(fName, tgtpthstrYM)
2020/04/01
File Handling with Python
This little utility is for copying files from source to target directories. On the way it checks whether a directory exists in the target, if not creates and then copies the files.
2020/03/17
Power BI - Rendering Rich Text in Table Viz
Power BI Table Viz does not support formatting the content stored in Rich Text format in the database columns. The data will be displayed as it is in the Power BI Table Viz.
For Example:
Data stored in the table
 When Imported into Power BI and displayed in the Table viz, the html
formatting tags are retained and displayed as it is :
When Imported into Power BI and displayed in the Table viz, the html
formatting tags are retained and displayed as it is :
The above way of presenting data poses difficulty to read the content amidst of all the tags.
Power Query M language has a built-in function "Html.Table" which can be used to format the code as per the html tags specified int he contents.
In order to remove the tags and format code as per the specified tags, follow these steps.
#1 Import the table into Power BI as usual, and edit the table using Query Editor.
Original Columns in the table with rich text format:

#2 Add a new column to format the contents of "TimelineDescription"

#3 Use below formula for formatting the contents.

if [TimelineDescription] <> null
then Html.Table(
[TimelineDescription], {{"text",":root"}}
)
else null
This will produce HTML table, expand column properties and extract "text" as below-

#4 This will replace the HTML table with formatted text as below:

In this 1 - is original column and 2 - is the formatted text.
#5 In the Power BI Table viz the formatted is displayed as below:

Power BI - Add Data "Refresh Date and Time" to Report
Adding "Refresh Date and Time" to PBI Report
We all know
that Power BI Reports can access data from source databases in two ways -
Import, Direct Query.
With "Import" data will be imported into Power BI and will be refreshed periodically. It will be beneficial for business to know when the data was last refreshed, without this information it might add confusion on the data accuracy.
It is possible to add "Refresh Date" to Power BI Reports and the required process is as below:
#1 : Open the Power BI Report where the Refresh Date need to be added.
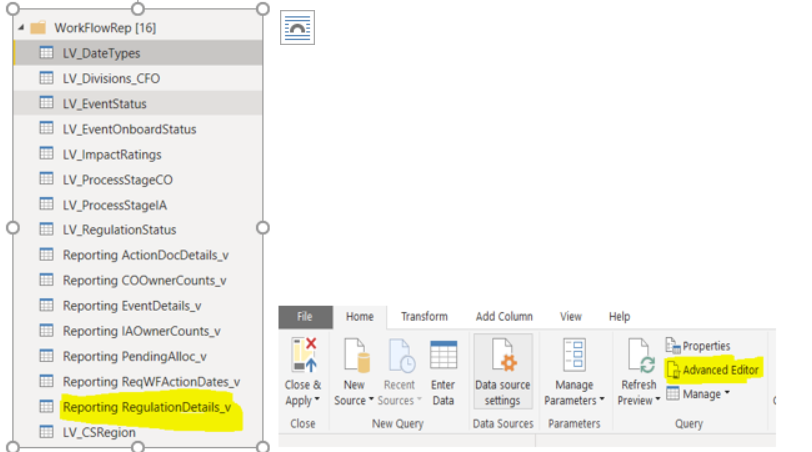
#2 : Open the "Edity Query" , select the table related to the report, and select "Advanced Editor" as below:
#3 In the "Advanced Editor", add below code as the last line, just before the "in" command as below:
 In this
:
In this
:
#4 after "in" , replace the existing name which represents the last step in the Query. Save the changes
#5 Click "Close & apply" to commit the changes

#6 You can verify the new column and its contents from the "Edit Query"

#7 Return to the Report Interface and add Card OR Tex Box to display the new column "Refresh Date"

#8 Adjust the Title , turn off "Category" and any other required changes

#9 Refres the Data and verify whether last Refresh Date

With "Import" data will be imported into Power BI and will be refreshed periodically. It will be beneficial for business to know when the data was last refreshed, without this information it might add confusion on the data accuracy.
It is possible to add "Refresh Date" to Power BI Reports and the required process is as below:
#1 : Open the Power BI Report where the Refresh Date need to be added.
#2 : Open the "Edity Query" , select the table related to the report, and select "Advanced Editor" as below:
#3 In the "Advanced Editor", add below code as the last line, just before the "in" command as below:
|
1
|
Step Name for adding Refresh Date,
this can be any name
|
|
2
|
Previous Step Name from the Query
|
|
3
|
New Column Name to hold the
"Refresh Date"
|
|
4
|
DAX Function to capture the
Refresh Date and Time in UTC format
|
|
5
|
DAX
Function to conver the the UTC Date & Time to Local Format |
|
6
|
Last step name in the Query
|
#4 after "in" , replace the existing name which represents the last step in the Query. Save the changes
#5 Click "Close & apply" to commit the changes
#6 You can verify the new column and its contents from the "Edit Query"

#7 Return to the Report Interface and add Card OR Tex Box to display the new column "Refresh Date"
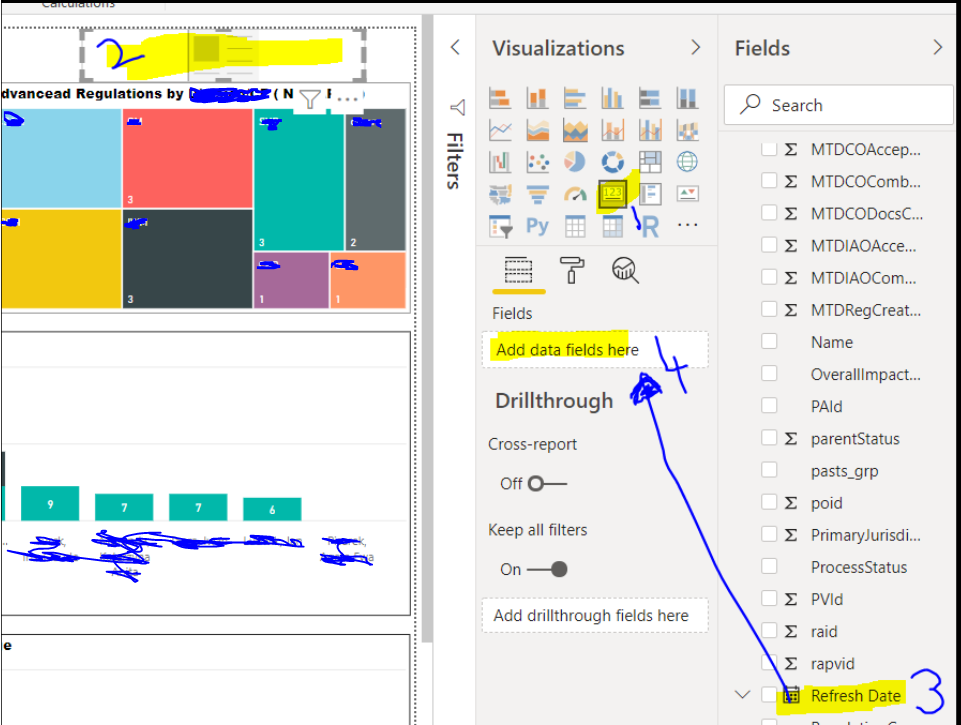
#8 Adjust the Title , turn off "Category" and any other required changes
#9 Refres the Data and verify whether last Refresh Date

2020/01/27
OCR GCSE Python Challenges
#1 Master Mind
Generate a random four digit number. The player has to keep inputting four digit numbers until they guess the randomly generated number. After each unsuccessful try it should say how many numbers they got correct, but not which position they got right. At the end of the game should congratulate the user and say how many tries it took.
Solution:
++++++++++++++++++++++++++++++++++++++++++++++++++++++++++++++import random

def gen4digitrandom() :
    gen4num = str(random.randint(1000,10000))
    print('random number is :', gen4num)
    return gen4num.strip()

def guess4digitnum():
    guess = input("Enter a 4 Digit Number. 0 to Quit")
    return guess.strip()

def checkinput(guess,random,cnt,loop):
     print(loop,'. You entered :', guess)
     if guess == random:
         return 99  #true
     else:
         g1 = list(str(guess))
         r1 = list(str(random))
         for i in range(len(g1)):
             if g1[i] in r1:
                 cnt += 1
               #  print(g1[i])
             else:
                 pass
     return cnt

def main():
    num = gen4digitrandom()
    #print('Random 4 digit number is :',num)
    guess = guess4digitnum()
#    print('You entered :', guess)
    cnt = 0
    loop = 0
    if guess != '0':
        res = checkinput(guess,num,cnt,loop)
        if res == 99:
            print("BINGO! You got it right! Your Number is :",guess," and Random Number is: ", num)
        else:
            # Increase the loop check to allow more tries.
            while ( loop <10  and guess != '0' ):
                if res == 99:
                    print("BINGO! You got it right! Your Number is :", guess, " and Random Number is: ", num)
                    break
                else:
                    print("You matched :", res, " digits.  Try Again! Count is ::", loop)
                    guess = guess4digitnum()
                    loop += 1
                    res = checkinput(guess, num, cnt, loop)


        if res != 99 and loop >=10:
            print("You are out of lives!!! Try Later!!")
    else:
        print("You lost!!")
main()

++++++++++++++++++++++++++++++++++++++++++++++++++++++++++++++++++++++
++++++++++++++++++++++++++++++++++++++++++++++++++++++++++++++import random def gen4digitrandom() : gen4num = str(random.randint(1000,10000)) print('random number is :', gen4num) return gen4num.strip() def guess4digitnum(): guess = input("Enter a 4 Digit Number. 0 to Quit") return guess.strip() def checkinput(guess,random,cnt,loop): print(loop,'. You entered :', guess) if guess == random: return 99 #true else: g1 = list(str(guess)) r1 = list(str(random)) for i in range(len(g1)): if g1[i] in r1: cnt += 1 # print(g1[i]) else: pass return cnt def main(): num = gen4digitrandom() #print('Random 4 digit number is :',num) guess = guess4digitnum() # print('You entered :', guess) cnt = 0 loop = 0 if guess != '0': res = checkinput(guess,num,cnt,loop) if res == 99: print("BINGO! You got it right! Your Number is :",guess," and Random Number is: ", num) else: # Increase the loop check to allow more tries. while ( loop <10 and guess != '0' ): if res == 99: print("BINGO! You got it right! Your Number is :", guess, " and Random Number is: ", num) break else: print("You matched :", res, " digits. Try Again! Count is ::", loop) guess = guess4digitnum() loop += 1 res = checkinput(guess, num, cnt, loop) if res != 99 and loop >=10: print("You are out of lives!!! Try Later!!") else: print("You lost!!") main()++++++++++++++++++++++++++++++++++++++++++++++++++++++++++++++++++++++
Extension 1 # Let the user pick an easy mode which shows the user which position that they guessed correctly.
Solution:
import random

def gen4digitrandom() :
    gen4num = str(random.randint(1000,10000))
    print('random number is :', gen4num)
    return gen4num.strip()

def guess4digitnum():
    guess = input("Enter a 4 Digit Number. 0 to Quit")
    return guess.strip()


def checkinput_E(guess, random, cnt, loop):
    print("Easy Mode\n+++++++")
    print(loop, '. You entered :', guess)
    if guess == random:
        return 99  # true
    else:
        g1 = list(str(guess))
        r1 = list(str(random))
        match = []
        for i in range(len(g1)):
            if g1[i] in r1:
                print('Chekcing',g1[i],'in ',r1)
                cnt += 1
                #for j in range(len(g1)):
                for k in range(len(g1)):
                    if g1[i] == r1[k]:
                        match.append(k)
                        break
                    else:
                        pass
            #  print(g1[i])
            else:
                pass
    print("You matched positions :", match )
    return cnt

def checkinput(guess,random,cnt,loop):
     print(loop,'. You entered :', guess)
     if guess == random:
         return 99  #true
     else:
         g1 = list(str(guess))
         r1 = list(str(random))
         for i in range(len(g1)):
             if g1[i] in r1:
                 cnt += 1
               #  print(g1[i])
             else:
                 pass
     return cnt

def main():
    mode = input("Do you want start the game in E(asy) or H(ard) mode? \n Easy mode shows the matching position.")
    num = gen4digitrandom()
    #print('Random 4 digit number is :',num)
    guess = guess4digitnum()
    cnt = 0
    loop = 0
    if guess != '0':
        if mode.strip() != 'E':
            res = checkinput(guess,num,cnt,loop)
        else:
            res = checkinput_E(guess, num, cnt, loop)

        if res == 99:
            print("BINGO! You got it right! Your Number is :",guess," and Random Number is: ", num)
        else:
            # Increase the loop check to allow more tries.
            while ( loop <10  and guess != '0' ):
                if res == 99:
                    print("BINGO! You got it right! Your Number is :", guess, " and Random Number is: ", num)
                    break
                else:
                    print("You matched :", res, " digits.  Try Again! Count is ::", loop)
                    guess = guess4digitnum()
                    loop += 1
                    if mode.strip() != 'E':
                        res = checkinput(guess, num, cnt, loop)
                    else:
                        res = checkinput_E(guess, num, cnt, loop)


        if res != 99 and loop >=10:
            print("You are out of lives!!! Try Later!!")
    else:
        print("You lost!!")
main()
Extension 2 # Let the user pick a hard mode that gives five digits instead of four.
Solution:
import random

def gen4digitrandom() :
    gen4num = str(random.randint(1000,10000))
    print('random number is :', gen4num)
    return gen4num.strip()

def guess4digitnum():
    guess = input("Enter a 4 Digit Number. 0 to Quit")
    return guess.strip()

def checkinput_E(guess, random, cnt, loop):
    print("Easy Mode\n+++++++")
    print(loop, '. You entered :', guess)
    if guess == random:
        return 99  # true
    else:
        g1 = list(str(guess))
        r1 = list(str(random))
        match = []
        for i in range(len(g1)):
            if g1[i] in r1:
                print('Chekcing',g1[i],'in ',r1)
                cnt += 1
                #for j in range(len(g1)):
                for k in range(len(g1)):
                    if g1[i] == r1[k]:
                        match.append(k)
                        break
                    else:
                        pass
            #  print(g1[i])
            else:
                pass
    print("You matched positions :", match )
    return cnt
# Hard mode - 5 digits
def gen5digitrandom() :
    gen5num = str(random.randint(10000,100000))
    print('random number is :', gen5num)
    return gen5num.strip()

def guess5digitnum():
    guess = input("Enter a 5 Digit Number. 0 to Quit")
    return guess.strip()

def checkinput(guess,random,cnt,loop):
     print(loop,'. You entered :', guess)
     if guess == random:
         return 99  #true
     else:
         g1 = list(str(guess))
         r1 = list(str(random))
         for i in range(len(g1)):
             if g1[i] in r1:
                 cnt += 1
               #  print(g1[i])
             else:
                 pass
     return cnt

def main():
    mode = input("Do you want start the game in E(asy) or H(ard) mode? \n Easy mode shows the matching position.")

    if mode.strip() == 'E':
        num = gen4digitrandom()
        #print('Random 4 digit number is :',num)
        guess = guess4digitnum()
    else:
        num = gen5digitrandom()
        # print('Random 5 digit number is :',num)
        guess = guess5digitnum()
    cnt = 0
    loop = 0
    if guess != '0':
        if mode.strip() != 'E':
            res = checkinput(guess,num,cnt,loop)
        else:
            res = checkinput_E(guess, num, cnt, loop)

        if res == 99:
            print("BINGO! You got it right! Your Number is :",guess," and Random Number is: ", num)
        else:
            # Increase the loop check to allow more tries.
            while ( loop <10  and guess != '0' ):
                if res == 99:
                    print("BINGO! You got it right! Your Number is :", guess, " and Random Number is: ", num)
                    break
                else:
                    print("You matched :", res, " digits.  Try Again! Count is ::", loop)
                    guess = guess4digitnum()
                    loop += 1
                    if mode.strip() != 'E':
                        res = checkinput(guess, num, cnt, loop)
                    else:
                        res = checkinput_E(guess, num, cnt, loop)


        if res != 99 and loop >=10:
            print("You are out of lives!!! Try Later!!")
    else:
        print("You lost!!")
main()
2018/07/20
Hive OpenCSVSerde - Impala error
SerDe library 'org.apache.hadoop.hive.serde2.OpenCSVSerde'
I have a Hive external table created on a CSV file using the SerDe - 'org.apache.hadoop.hive.serde2.OpenCSVSerde'. The external table created OK and am able access from Hive.
But when I try to access the same table from Impala, it starts throwing the error - "SerDe library 'org.apache.hadoop.hive.serde2.OpenCSVSerde' is not supported."
Looks like Impala does not recognize the Hive's OpenCSVSerde.
To get around the problem, I had to follow these steps :
- Create Hive External Table - stored as TextFile
- Create Hive table ( managed ) using CTAS - stored as PARQUET
- Access the Parquet table from Impala
Hope if any one is facing the same issue will find this solution useful.
2017/12/28
SQOOP Import direct option --ORA-00942: Table or view does not exist error
While testing out "--direct" option available to invoke "OraOOP" with Sqoop imports into HDFS, I have stumbled across the error -
"Ora-00942 Table or View Does not exist"
I am pretty sure that the table exist as the Sqoop Import has been tested using Generic JDBC Driver.
Going through Sqoop docs, it is mentioned that it requires several privileges as below:
"Ora-00942 Table or View Does not exist"
I am pretty sure that the table exist as the Sqoop Import has been tested using Generic JDBC Driver.
Going through Sqoop docs, it is mentioned that it requires several privileges as below:
The Oracle user for The Data Connector for Oracle and Hadoop requires the
following roles and privileges:
-
create session
In addition, the user must have the select any dictionary privilege or
select_catalog_role role or all of the following object privileges:
-
select on v_$instance -
select on dba_tables -
select on dba_tab_columns -
select on dba_objects -
select on dba_extents -
select on dba_segments— Required for Sqoop imports only -
select on dba_constraints— Required for Sqoop imports only -
select on v_$database— Required for Sqoop imports only -
select on v_$parameter— Required for Sqoop imports only
In addition to the listed roles and privileges in the doc, it also requires "SELECT_CATALOG_ROLE" for the Sqoop Import to succeed using "--direct" option.
After granting the role to the user using which the import is being performed, the Sqoop Import process succeeded.
2017/12/22
Installing Python 3.6.4. , iPython and Jupyter on RHEL 7
My Virtual Box Environment:
VBox 5.1.26
Oracle Linux 7
yum install kernel-devel
yum install kernel-uek-devel
install guestadditions
wget https://www.sqlite.org/2017/sqlite-autoconf-3210000.tar.gz
Extract Source Code - tar xzvf sqlite-autoconf-3210000.tar.gz
./configure
make
make install
OR yum install sqlite
#2 yum install sqlite-devel
Download Pyhon3.6*
wget https://www.python.org/ftp/python/3.6.4/Python-3.6.4.tgz
Extract source code:
cd $HOME/pythonsw
tar -xzf Python-3.6.4.tgz
This will create a directory named "Python3.6.4" under pythonsw
If you are installing Python3.* on top of existing Python2* then, it is better to keep the installations separate.
Create a directory under $HOME to host Python3*. In my case I created - /usr/local under $HOME.
cd $HOME
mkdir usr
cd usr
mkdir local
Installation
cd $HOME/pythonsw/Python-3.6.4/
./configure --enable-optimizations
make altinstall prefix=$HOME/usr/local exec-prefix=$HOME/usr/local
This should install Python 3.6
Accessing Python3.6
Create an alias for Python3.6
cd $HOME/usr/local/bin
ln -s Python3.6 Python3
Now add this path to your $PATH environment variable. Notice that we add the new path before existing $PATH. This is so that our local Python is always used before any other.
echo "export PATH=\$HOME/usr/local/bin:\$PATH" >> ~/.bashrc
source ~/.bashrc
Verify installation by running the commands
which python3 => this should list the custom Python3.6 location path
which python => this should list the default Python 2* location, if you have any
Verify --

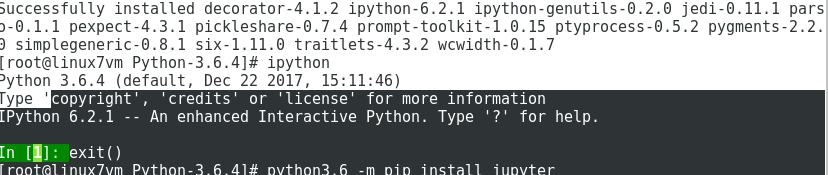
Initially after installing Jupyter, when attempted to access I got errors stating "SQLite3" was not available. So I had to trash everything - Python3.6, iPython and Jupyter - and follow the steps starting from "Pre-install requiresites" of this document and re-install Python3.6, iPython and Jupyter.
Verify -


VBox 5.1.26
Oracle Linux 7
To install Guest Additions : as root
yum groupinstall 'Developoment Tools'yum install kernel-devel
yum install kernel-uek-devel
install guestadditions
Python3.6 install pre-requisites
#1 Requires SQLite3wget https://www.sqlite.org/2017/sqlite-autoconf-3210000.tar.gz
Extract Source Code - tar xzvf sqlite-autoconf-3210000.tar.gz
./configure
make
make install
OR yum install sqlite
#2 yum install sqlite-devel
Python3.6 installation
cd $HOME
mkdir pythonsw
cd pythonsw
Download Pyhon3.6*
wget https://www.python.org/ftp/python/3.6.4/Python-3.6.4.tgz
Extract source code:
cd $HOME/pythonsw
tar -xzf Python-3.6.4.tgz
This will create a directory named "Python3.6.4" under pythonsw
If you are installing Python3.* on top of existing Python2* then, it is better to keep the installations separate.
Create a directory under $HOME to host Python3*. In my case I created - /usr/local under $HOME.
cd $HOME
mkdir usr
cd usr
mkdir local
Installation
cd $HOME/pythonsw/Python-3.6.4/
./configure --enable-optimizations
make altinstall prefix=$HOME/usr/local exec-prefix=$HOME/usr/local
This should install Python 3.6
Accessing Python3.6
Create an alias for Python3.6
cd $HOME/usr/local/bin
ln -s Python3.6 Python3
Now add this path to your $PATH environment variable. Notice that we add the new path before existing $PATH. This is so that our local Python is always used before any other.
echo "export PATH=\$HOME/usr/local/bin:\$PATH" >> ~/.bashrc
source ~/.bashrc
Verify installation by running the commands
which python3 => this should list the custom Python3.6 location path
which python => this should list the default Python 2* location, if you have any
iPython Installation
Preq-Requisite:
After installation of Python3.6 when tried to download iPython using pip, i was getting the error
"
pip is configured with locations that require tls/ssl centos"
You need to remove any Python3.6 installation on your system first, make below changes and re-install Python 3.6
enable openSSL =>
Navigate to the directory where Python3.6 is extracted
vi /root/Downloads/Python3.6/Modules/Setup.dist
search for SSL
make sure SSL is set to correct path and uncomment the lines as below:
SSL=/usr/lib64/openssl # this is the location where openssl is installed in my VM
_ssl _ssl.c \
-DUSE_SSL -I$(SSL)/include -I$(SSL)/include/openssl \
-L$(SSL)/lib -lssl -lcrypto
Save Changes
Continue to install "pip"
python3.6 -m pip install ipythonpip is configured with locations that require tls/ssl centos"
Collecting pip
  Could not fetch URL https://pypi.python.org/simple/p
ip/: There was a problem confirming the ssl certificat
e: Can't connect to HTTPS URL because the SSL module i
s not available. - skipping
  Could not find a version that satisfies the requirem
ent pip (from versions: )
No matching distribution found for pip
To resolve this error, the below openSSL config is required. You need to remove any Python3.6 installation on your system first, make below changes and re-install Python 3.6
enable openSSL =>
Navigate to the directory where Python3.6 is extracted
vi /root/Downloads/Python3.6/Modules/Setup.dist
search for SSL
make sure SSL is set to correct path and uncomment the lines as below:
SSL=/usr/lib64/openssl # this is the location where openssl is installed in my VM
_ssl _ssl.c \
-DUSE_SSL -I$(SSL)/include -I$(SSL)/include/openssl \
-L$(SSL)/lib -lssl -lcrypto
Save Changes
Continue to install "pip"
Verify --
Jupyter Notebook installation
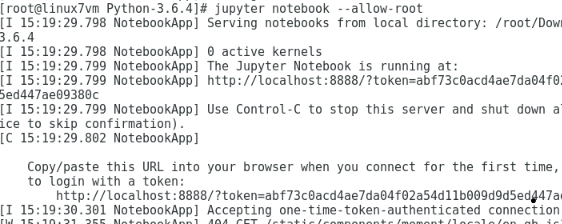
python3.6 -m pip install jupyterInitially after installing Jupyter, when attempted to access I got errors stating "SQLite3" was not available. So I had to trash everything - Python3.6, iPython and Jupyter - and follow the steps starting from "Pre-install requiresites" of this document and re-install Python3.6, iPython and Jupyter.
Verify -


2017/09/11
AWS CLI - Error - AWS was not able to validate credentials
I have set up AWS EC2 instance through AWS Management Console and able to launch it. While using AWS CLI to connect to instances I encountered the error "AWS was not able to validate credentials" error.
I have carried out below steps:


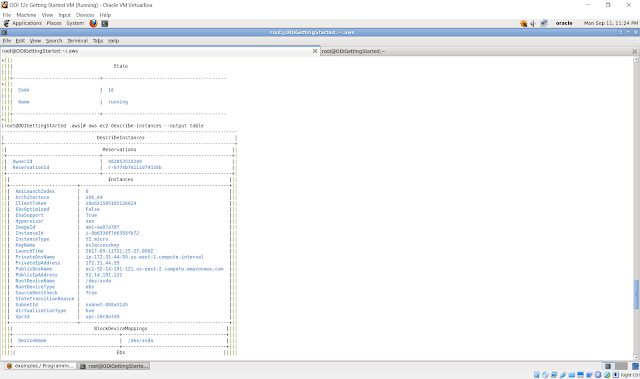
I have carried out below steps:
- set up AWS instance through Console
- Create Access Keys and downloaded the rootkeys.csv file
- On Linux machine, installed Python 3.6
- Installed AWS CLI tool
- Configured AWS CLI on linux machine using the command - aws configure
After all these steps, when I run the command - aws ec2 describe-instances, I was encountering the error "AWS was unable to validate credentials".
I verified the AWS credentials file, all the details like AWS Access ID and AWS Secret Key are all present.
To resolve this error, I had to explicitly export the variables AWS_ACCESS_KEY and AWS_SECRET_KEY.
After this I am able to connect to the running instances from AWS CLI.

Subscribe to:
Posts (Atom)
-
 After installing Oracle DVD, I started playing around with the connections to various data sources. With the new release, the connections ...
 -
I have been playing around with the OBIEE repository for a demo project at current client assignment. I have been trying to use the "wh...
-
 I have been working on a client assignment to implement OBIEE and design and develop dashboards and get them up and running. One particul...
